Tips for fryer usage – Bunge Pro – Professzionális sütőolaj

Loading the fryer with solid fats

Solid fats need to be handled carefully when being introduced into the fryer. Make sure you understand and follow one of the two methods presented on the following pages. Remember that solid fats must be filtered warm because fats solidify as they cool.  

Load the fryer with extreme caution! 

A flash fire may occur if the fryer is not handled properly. 

Only load fryer in full accordance with your management instructions.

Loading solid fats – Method 1

Solid fats should be melted in a separate container before loading in the fryer. Care should be taken while melting fat to avoid overheating. When a sufficient amount of fat has been melted to cover the heating elements of your fry kettle, pour the melted solid fat into the fryer. Turn the heat on and start placing small pieces of solid fat in the fryer until the fill mark of your kettle has been reached.

Loading solid fat – Method 2

An alternative method of melting – though not as beneficial to the fat – is to pack the solid fat around the heating elements before turning the fryer on. Set the fryer thermostat on its minimum setting so you don’t scorch the fat.

Why does solid fat require so much caution? Fat begins to break down when heated. Fat dropped onto a hot element will smoke and darken. This extreme heat will considerably reduce the performance of the fat, even before you have finished loading the fryer. 

Loading the fryer with liquid oils

It is not necessary to melt liquid oils prior to use. Simply pour the oil into the fryer slightly below the full mark before turning on the heat.

To insure proper fryer operation, it is very important to keep the oil quantity at the level specified by the manufacturer of the fryer. A deep fryer is designed to operate at maximum efficiency with a certain amount of oil. When the oil level is too low or too high, uneven frying and excessive browning may occur. 

  1. For best results, allow the oil to cool to 60-80°C before filtering.
  2. Disposable filters are preferred to washable filters. With washable filters, if all the soap is not removed and if the filter is not dry prior to use, the oil may be damaged rather than improved by filtration.
    Note: do not ever reuse disposable filters!  
  3. Filtering aids are quite effective for the removal of fine particles from the oil, when used as directed; nevertheless care must be exercised in selecting the appropriate filtering aid.
  4. Every precaution must be taken to insure that no unnecessary aeration of the oil occurs during filtering. Do not pour or drain the oil from too big distance. Aeration, splashing or bowling air through the oil with a pump will promote rapid oxidation, decreasing the oil performance.
  5. Rinse out the residual crumbs from the fryer with a portion of the filtered oil if the fryer is not to be washed at the time. 
  6. When the fryer is refilled, check and make sure that the correct oil level is maintained for optimal results. To ensure proper operation of the unit, it is very important to keep the oil at the level as specified by the manufacturer.

How often should the frying oil be filtered?

This depends mainly on the specific activity. Regardless of the operation type, the oil should be filtered at least once a day to remove the fine carbonized particles from the oil, along with the accumulated crumbs at the bottom of the fryer. Flours from breaded food, starch from potatoes and small pieces of food will carbonize in a short period of time, giving the oil a sharp or bitter flavour, and causing it to turn dark at an increased rate. Additionally, dark carbonized particles will adhere to fried food, making the food look unattractive. 

Benefits of daily filtering:

  • Removes  particles
  • Makes fryer cleaning easier
  • Improves fried food appearance and taste
  • Maintains oil colour and clarity
  • Reduces deposits in the fryer
  • Extends the life of your oil

Oil rotation

The convenience of having several fryers in your operation allows you to rotate your oil. That is, to dedicate one fryer to French fries for an allotted period of time and then use this oil for products, which impart flavours such as chicken, onion rings, or fish. 

Fryers should be boiled out with commercial fryer cleaner before filling up the fryer with fresh oil. 

  1. Drain the fryer while oil is still warm, and properly dispose of used oil. Rinse the fryer with hot water until all crumbs are flushed out.
  2. Boil out fryer, baskets, skimmers, etc. with good commercial cleaner designed for cleaning deep fryers and follow the manufacturer’s instructions for use (An initial 30 minutes boil-out is the usual recommendation). Clean the metal baskets simultaneously by immersing them in the solution – this will loosen the polymerized material that has formed on the baskets. Turn the heat off and remove all the loosened deposits with a nylon scrub pad. Do not use metal scrub pads or wire brushes as there will scratch the finish and possibly leave metal shavings in the fryer. All traces of polymerized material should be removed. 
  3. Drain and rinse the fryer, baskets and skimmers several times with clear tap water. 
  4. Fill fryer with a solution of 1 part vinegar to 20 parts hot water. This vinegar rinse neutralizes and removes residues. 
  5. Drain, rinse and thoroughly dry with lint free towels. Paper towels are best, as laundered towels may contain traces of soap. Air drying overnight is another option. Remember that water is a prime cause of oil breakdown. 
  6. Check drain valves. Many drain valves are made of copper. Ensure that the oil does not come in contact with copper. Copper supports oxidation, and imparts an off-flavour to your fried food.
  7. Refill the fryer to the correct level with Bunge Pro oil. Do not mix Bunge Pro oil with other oils. New fryers should be cleaned following the above procedure.

Check the thermostats frequently 

Why you should check the thermostats? Overheating is one of the major causes of decreased performance. Frying oil decomposes when exposed to air at high temperatures. The oil becomes darker in colour, develops off-flavours and begins to smoke excessively. 

Heat- although a necessary part of any frying operation – is detrimental to the performance of the oil. The higher is the temperature of the fryer, the faster the breakdown will occur, particularly during slack periods when no frying is being done. Reducing the temperature of the oil to 60-90°C during slack periods will improve profits in the form of increased oil performance and energy saving. Frying at too low temperatures will produce undercooked foods, or greasy, unappealing food.

Thermostats may become inaccurate due to heat, polymer film forming, age, or abuse. Each fryer should be examined regularly to check the accuracy of the thermostat and/or thermometers. You should use a metal dial-type or electronic thermometer, the accuracy of which is verified, on regular basis. Mercury-filled glass thermometers have a high degree of accuracy and reliability, but they should not be used because of risks of breaking.  

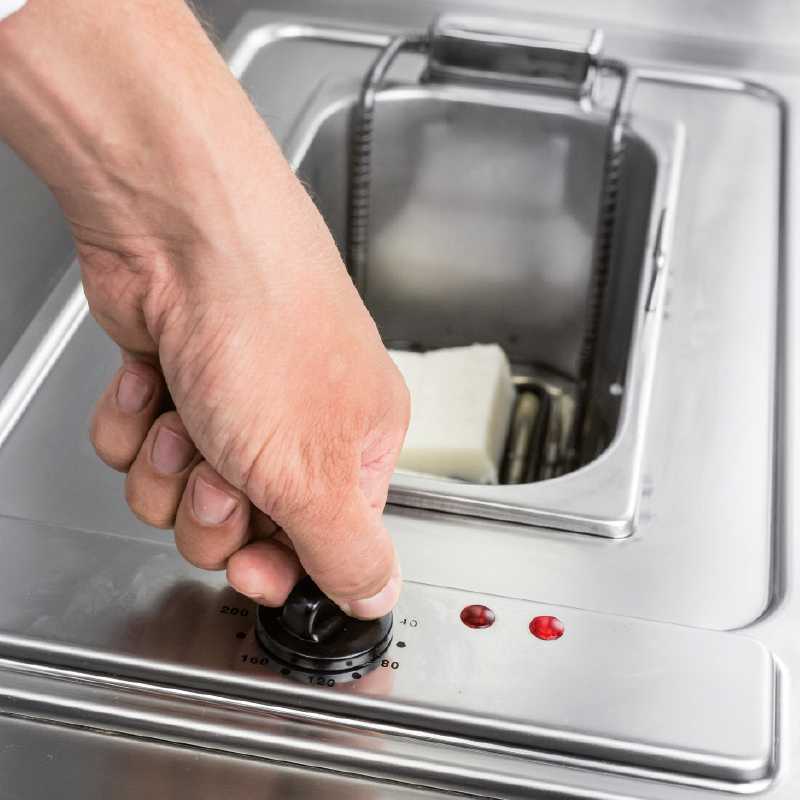
To determine the mean temperature of the thermostat, follow these four steps:

  1. Set thermostat carefully to the normal frying temperature.
  2. Record the highest oil temperature after the heat is turned off. This temperature is usually 10-15°C higher than the thermostat setting.
  3. Record the temperature at which the heat comes back on. 
  4. To establish the mean temperature, add the low temperature and the high temperature and divide by two. 

Fry all foods at 175°C (unless a specific recipe, item or direction suggests a different frying temperature)

Facts support that best food quality and oil productivity is obtained at a 175°C frying temperature.

Close Menu